Oyster mushroom is one of the most commonly growing mushrooms. It is a very famous mushroom known for its delicious taste and high nutritional value. Oyster mushrooms can be eaten raw or cooked.
Luckily, oyster mushrooms can be easily grown in a minimum available space at your home. Growing oyster mushrooms at home is quite easy and just needs a little knowledge and technical expertise.
If you have gone through all the processes of cultivating oyster mushrooms including the steps of inoculating, incubating, and fruiting oyster mushrooms, the great news is that you have come so close to success. The next step is to harvest the delicious oyster mushrooms.
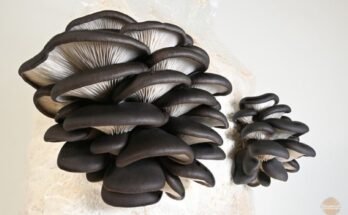
The most delightful part of cultivating oyster mushrooms is the appearance of the fruit. Once the pinheads are formed the mushrooms will grow fruit quickly. If you keep your fungus well hydrated the fruit will develop rapidly. You will notice your mushrooms growing bigger and bigger within hours.
Make sure you harvest your mushrooms timely and in the right way. If you delay the mushrooms will get too dry and will ultimately become discolored. Such mushrooms also lose the visible appeal to the consumers.
When oyster mushrooms are ready for harvesting?
If you purchase an oyster mushroom growing kit it will give you complete information and a time frame for harvesting your oyster mushrooms. However, the growing kit just gives an estimate, it might vary depending upon the growing conditions. The mushrooms might be ready for harvesting a couple of days earlier. The general rule of thumb is to harvest oyster mushrooms when the cap turns from convex to a concave shape.
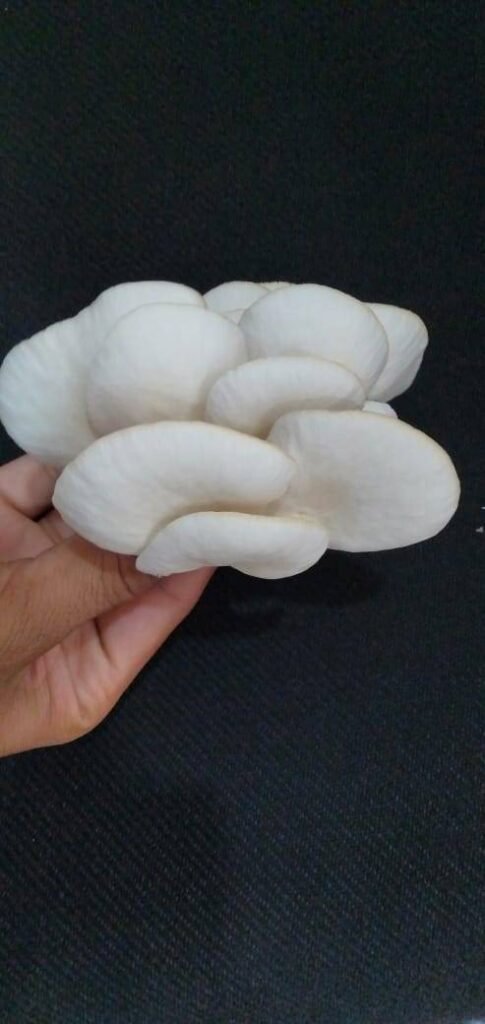
Oyster mushrooms should be picked within 3 to 5 days after the appearance of the first mushroom in a 7 to 10 days cropping cycle (also known as a flush). Once you pick up the first flush of mature mushrooms the next flush will be ready for harvesting soon.
Before you decide to harvest here are a few clues to look for.
- Flattening of the cap of oyster mushrooms
The first clue to finding out if an oyster mushroom is ready for harvesting or not is to check its cap. If the cap starts to flatten at the top and edges and turns upward, this is an indication that the oyster mushrooms are ready for harvesting. Harvest your mushrooms as soon as the curling effect appears. The mushrooms that curl upward lose their flavor. Moreover, at this stage, the mushrooms start to produce spores and prepare to begin the new cycle. - Darkening of the edges of caps and gills
As the mushrooms grow and enlarge, they start turning dark at the edges of caps and gills. Harvest in time and avoid getting the edges too dark. - Drying out
If the oyster mushrooms are left for a long time, they will start to get dry. It is important to harvest them before they get too dry. - Hardening
Mushrooms turn hard if left unharvested. Harvest your oyster mushrooms before they start to get hard.
If you notice any of the above mentioned clues, then it is advised to harvest oyster mushrooms as soon as possible.
What happens if oyster mushrooms are not harvested in time?
If oyster mushrooms are not harvested in time they will overgrow and get spoiled. The overgrown oyster mushrooms will lose their quality and taste.
How to harvest oyster mushrooms?
Harvesting oyster mushrooms is super easy. It’s not a big mystery. Though there is a debate among the amateur mycologists about whether to cut the mushrooms or twist and pull them. But remember it makes no difference. The mushroom growers can harvest their produce in any way either by cutting or plucking directly. The only thing to keep in mind is to pick up the oyster mushrooms as soon as they mature.
Look carefully and identify the mushrooms that are ready for harvesting. Leave those mushrooms that are just sprouted and let them grow to their full.
- Grab the mushrooms from the base and twist firmly. Don’t rush and don’t try to pull them directly without twisting OR
- Cut the mushrooms from the base with a clean scissor. Make sure you use a sharp scissor for cutting the mushrooms.
After harvesting the first crop/flush of oyster mushrooms, you can get another crop. All you need to do is to prepare the substrate for a second flush by providing an ample amount of moisture. The leftover mycelium will provide a second flush of nutritious oyster mushrooms.
The second flush will appear after one or two weeks by continuously saturating the substrate with moisture. Once you have harvested the second flush it is recommended to throw away the substrate.
If the mushroom mycelium has procured a lot of nutrients from the straw, then you may be able to turn the straw over and pick up a few more mushrooms from the other side of the grow bags. It might work in some cases.
Things you should do after harvesting
Once you have finished harvesting your oyster mushrooms, it is recommended to dispose of the substrate carefully in the trash or by composting.
It is advised to consume the oyster mushrooms as soon as you harvest them. You can eat them raw or cooked. Cook the fresh oyster mushrooms into delicious recipes such as soups, pasta, steaks, or grilled.
If you have a surplus amount of oyster mushrooms then it is recommended to store the surplus produce in airtight containers in a refrigerator.
Keep the surplus mushrooms in clean loosely packed plastic bags and put them in the refrigerator where they can stay fresh for 5 to 7 days. You can also store them in dried form or in a brine solution for a few weeks.
How to tell when the oyster mushrooms are gone bad?
Oyster mushrooms have a short shelf life and can go bad quickly if not stored properly.
- Check for color changes: Oyster mushrooms are usually white to light grey or brown but the color might vary depending upon the type of species or variety. If the mushrooms are too dark and have developed dark spots on their skin then they have gone bad and are unfit for consumption.
- Check the skin of mushrooms: If the texture of oyster mushrooms feels slimy or damp then these mushrooms are spoiled and should be discarded. Fresh mushrooms always feel dry.
- Check the smell of the mushrooms: If the oyster mushrooms emit an ammonia-like smell then it’s a clear indication that these mushrooms have gone bad. Fresh mushrooms have a pleasant earthy smell.
- Check the texture of the mushrooms: To check the texture of the mushrooms gently squeeze them. The fresh mushrooms will have firm skin with soft and slightly spongy flesh. On the other hand, the stale mushrooms will have a hard, dry, or brittle texture.
Bottom Line
Oyster mushrooms are a great source of protein and other essential nutrients. Luckily, oyster mushrooms are very easy to grow and don’t require a lot of investment. You can grow them at a minimum available space at your home or even at the kitchen shelves.
The most rewarding moment of cultivating oyster mushrooms is the fruiting stage. The oyster mushrooms start fruiting once the pinheads are formed. The fruit should be harvested before it starts to get flatten, darken, dry, or hard. If the mushrooms are left unharvested for a long time they will go bad and will be unsuitable for consumption. Cook the fresh oyster mushrooms immediately after harvesting. The surplus oyster mushrooms should be stored in clean airtight containers or loosely packed plastic bags.
Enjoy the freshly harvested oyster mushrooms and share them with your family and friends.
