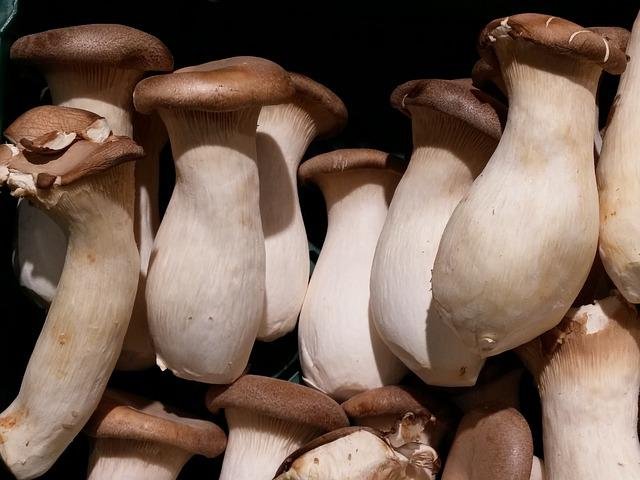
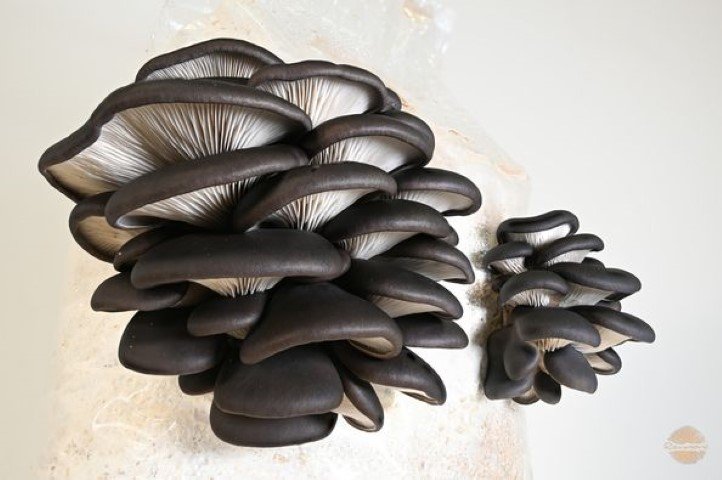
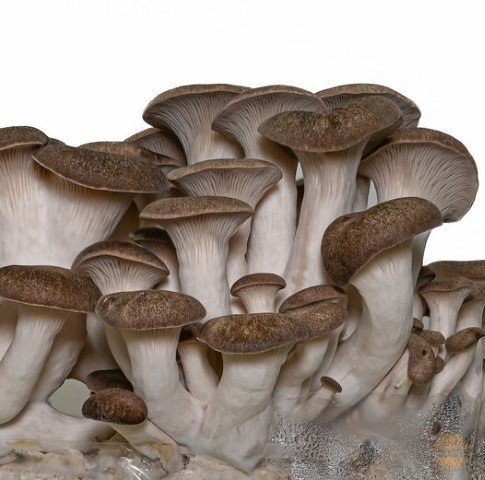
Pearl oyster mushroom (Pleurotus ostreatus) is the most common and popular mushroom in the oyster family. It is the first ever mushroom that was used for home cultivation and small-scale mushroom farming business. Now it is grown around the world for food purposes, and you can easily find it in supermarkets and grocery stores.
Pearl oyster mushroom is appropriate for beginners because it has a fast-growing mycelium. It competes with other fungi while growing on a substrate and therefore it is resistant to molds.
In this article, I will cover the benefits of pearl oyster mushrooms and when and how to grow them.
Are pearl oyster mushrooms good for health?
Undoubtedly, the pearl oyster mushroom is one of the best tasting and healthy edible mushrooms. They taste as good as they look.
It is often cultivated and consumed because it contains a high amount of nutrients and a plethora of essential fats, minerals, amino acids, proteins, and vitamins.
Pearl oyster mushroom is also rich in essential amino acids such as tryptophan, threonine, leucine, isoleucine, valine, and phenylalanine. These mushrooms have a soft and chewy texture and are rich in fiber.
It is also a potential source of dietary fibers and a great alternative for meat, and it is widely used in a variety of culinary dishes in different cuisines.
Plus, pearl oyster mushrooms have great health benefits. Eating pearl oyster mushrooms regularly reduces the risk of several diseases. It helps to lower cholesterol levels and the risk of heart disease. Some studies have also reported that oyster mushrooms can prevent breast and colon cancer.
Undoubtedly, pearl oyster mushroom is a wonder food that provides plenty of nutrients and boosts good health. To get the best benefit from pearl oyster mushrooms you can eat them raw or cooked.
How to identify pearl oyster mushrooms?
Pearl oyster mushroom gets its name due to its pearl-like appearance. The main feature based on which pearl oyster mushrooms can be differentiated from other mushrooms is their color.
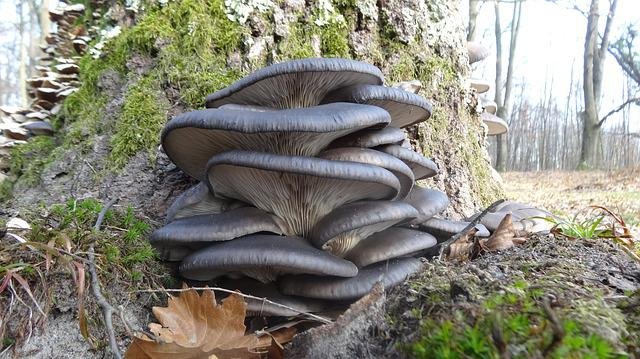
These mushrooms change color from cream to grayish and resemble a pearl. If you see a white or creamy-colored mushroom it is most likely a pearl oyster, if you see a golden, blue, or pink-colored mushroom it’s another variety of oyster mushrooms.
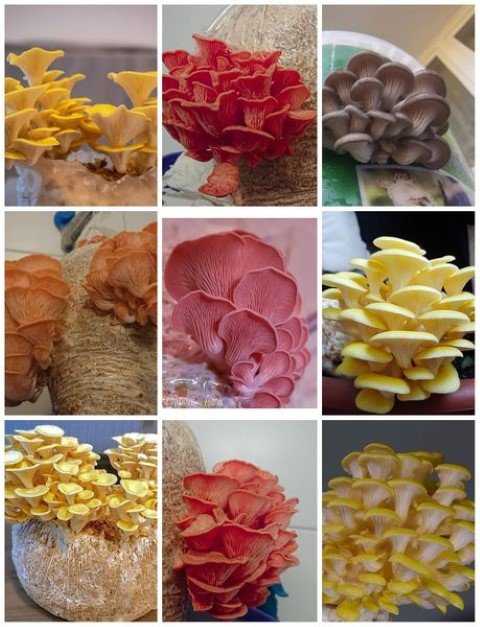
Overall pearl oyster mushrooms look like a seashell. This might be another reason it is given the name pearl oyster. Read more here.
How to grow pearl oyster mushrooms?
Growing pearl oyster mushrooms is just like any other strain of edible mushrooms. Pearl oyster mushrooms can be grown at home. You can buy an oyster mushroom growing kit which contains all the supplies and instructions on how to grow these mushrooms at home.
In this post, I will share complete information for novice growers on how to grow pearl oyster mushrooms at home.
1. Get a good quality spawn
Just like a seed is meant for growing food crops, spawn is used for propagating mushrooms. You can prepare spawn on your own or buy a good quality spawn from the market.
How to prepare pearl oyster mushroom spawn at home?
Do want to try making oyster mushroom spawn at home?
Follow the steps given below.
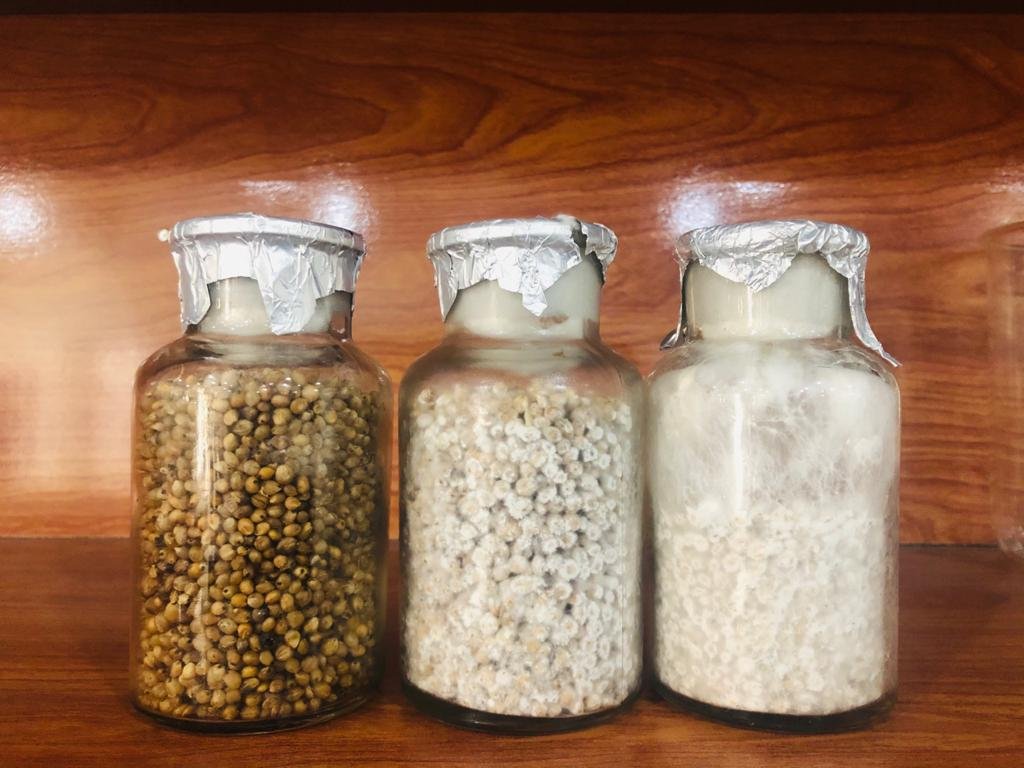
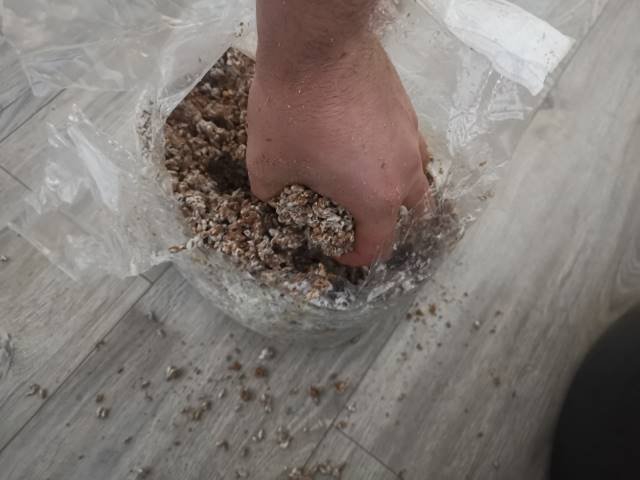
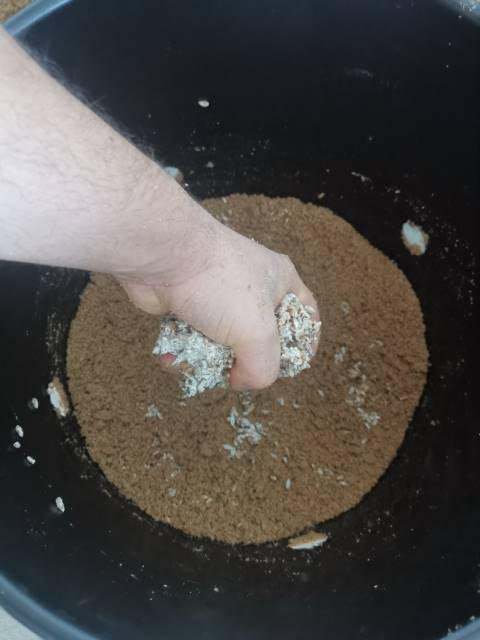
- Take a good quality healthy grain. I will recommend using barley or rye grain.
- Wash the grains and boil them until they become slightly soft. Boiling will also eliminate all the contaminating microorganisms on the grains.
- Drain the excess water after boiling and fill the grains in clean glass jars. You can also boil the grains by adding them to the glass jars and then placing them in a pressure cooker.
- Inoculate the sterilized grains with pearl oyster mushroom culture grown on an artificial medium or you can buy liquid culture from the market. If you have a small amount of pearl oyster spawn you can also simply put it on the grains.
- Take the liquid culture in a syringe and inoculate it onto the grains.
- Close the lids of glass jars and keep them in a clean place.
- The mushroom mycelium will start spreading and colonizing the grains within a couple of days.
- Keep stirring the grains daily to promote rapid colonization.
- It will take a couple of weeks or more for complete colonization of the grains depending on the size of the glass jar.
The homemade spawn will be fresh, and reliable and will increase the chances of your success in pearl oyster cultivation.
You can check the video below for a complete guide on how to prepare pearl oyster mushroom spawn at home.
Spawn preparation is a time-consuming process. If you don’t have enough time to prepare a spawn on your own, you can buy readily available spawns from any reputable dealer in the market. Make sure the spawn is not too old otherwise it will give poor spawn run and mushroom yield.
There are some reliable online dealers from where you can buy pearl oyster mushroom spawn and they will deliver it to your doorstep.
2. Substrate and the grow bags
A substrate is a basic medium that is required for the cultivation of any type of mushroom. The substrate provides the essential nutrients for the growth and colonization of mushroom mycelium.
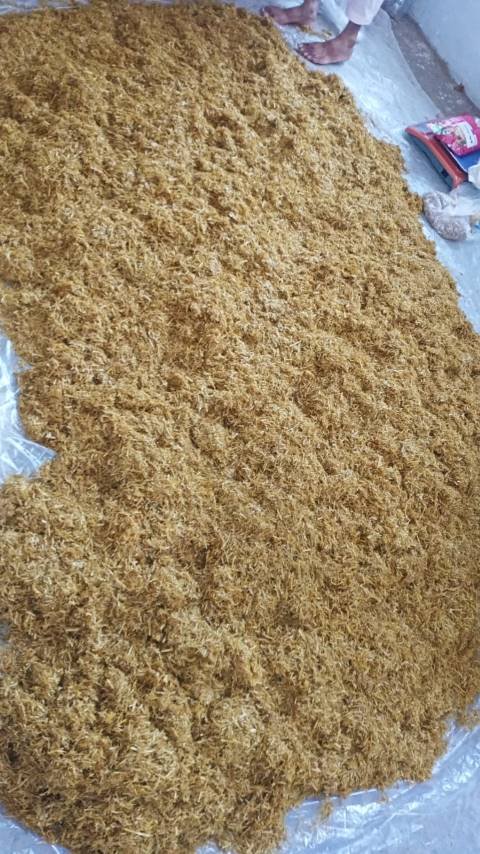
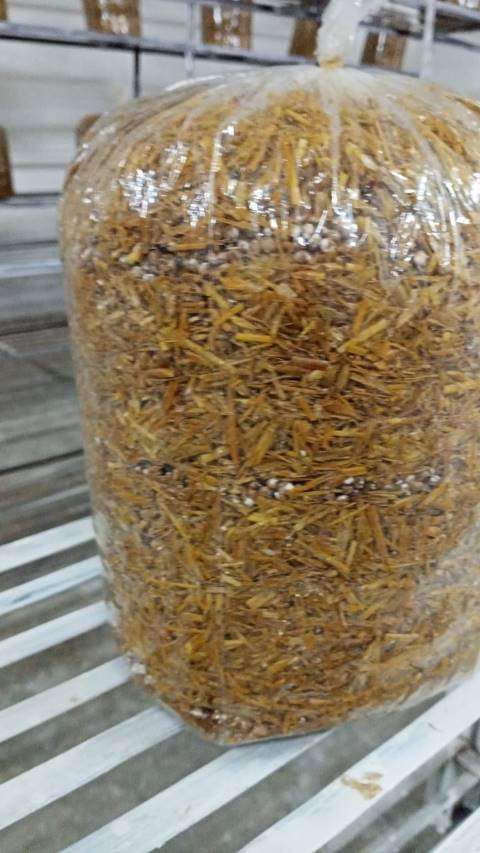
Several types of substrates are available and some of them have a significantly high yield potential. Some of the most commonly used substrates for growing oyster mushrooms include rice or wheat straw, sugarcane bagasse, rice husks, paper dust or cardboard, sawdust, cotton waste, coffee grounds, etc. These substrates contain carbon, nitrogen, and cellulose that support the growth of mushrooms.
Luckily, all these substrates are quite inexpensive and easily available. You don’t need to worry about spending a lot of money on buying substrates.
You can use these substrates alone or mix hardwood with them for a better yield. Several supplements are also available in the market which increases the supply of nutrients in the substrate. Bran or seed derivatives are the most used supplements. Oat bran or wheat bran can be mixed with the substrate at about 5 to 10 % of the total dry weight.
A good combination will be to use 10 % bran and 2 % gypsum along with any sterilized substrate. It will provide a high yield of pearl oyster mushrooms.
Mushrooms are grown in grow bags or buckets at home. You can buy good-quality grow bags or buckets from the market. If you have a pearl oyster mushroom growing kit it will already contain the grow bags.
3. Prepare the substrate
Substrate preparation is the most critical step which ensures the success of the whole mushroom cultivation process. The substrates contain several unwanted microbes which must be killed to avoid the risk of contamination.
Pasteurization or sterilization of the substrate is most important to kill unwanted microbes. If not sterilized properly these microbes will outcompete with the pearl oyster mycelium and will reduce the mycelial colonization and fruiting.
Some microbes are very fast growing they outcompete the mushroom mycelium and completely colonize the substrate bags.
Let’s look at the process for the preparation of the substrates.
- Take the substrate in the required quantity and add supplements (optional). I recommend using wheat straw or any other straw for growing pearl oyster mushrooms. It is readily available and provides rapid colonization and a bumper yield.
- Slightly moisten the substrate by sprinkling clean water.
- Fill the substrate in the grow bags or buckets.
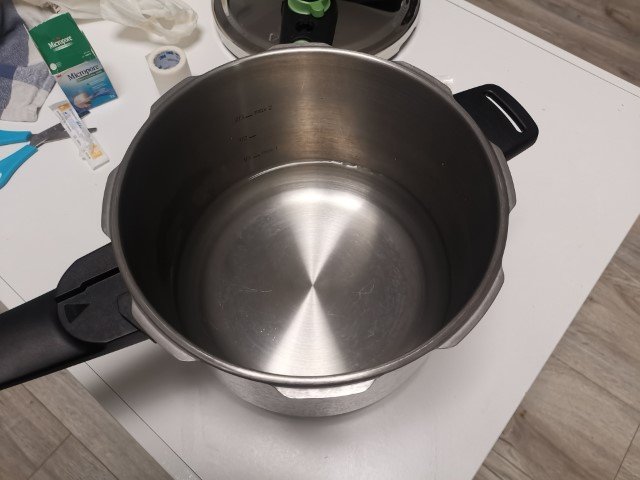
- Put the grow bags in a large drum or container filled with water and fitted on a burner. Heat the substrate at 60 to 80 degrees Celsius for 60 minutes or more. All unwanted microbes are generally killed at such a high temperature.
Note: You can also use an autoclave (if available) to sterilize the substrate. It is most efficient for sterilization of the substrate as it kills all the germs at 121 degrees Celsius and 15-20 psi pressure. However, it is not recommended to buy an autoclave for sterilization because it is quite expensive.
- You can also sterilize the substrate by soaking it in hydrated lime-treated water for 24 hours. However, sometimes, this method might not eliminate the microbes. I would recommend using the hot water sterilization method.
Did you complete all the steps for sterilization?
If yes, then you are all set to go for the next step.
4. Oyster Mushroom Spawning
Get a good-quality mushroom spawn and add it to the sterilized substrate. The inoculation of the sterilized substrate with mushroom spawn is known as ‘spawning’. It is just like sowing a seed for growing your favorite food crops. I always use 20 to 30 grams spawn in a 1 kg substrate bag which gives a good yield of pearl oyster mushroom. Don’t use more than 50 grams of spawn per 1 kg substrate bag.
Make sure your hands are clean while inoculating the spawn on the substrate or you can wear clean gloves. Put a layer of spawn on top of the substrate. Then close the bags by giving a knot or using a rubber band or a clip.
Mushrooms require proper aeration for spawn run and fruiting. Make a few holes around the bags to allow for air exchange.
You will often watch tutorials or videos where they make holes in bags right after filling them with the substrate. Don’t try this.
I will recommend you make holes only when the mushroom mycelium has colonized the substrate completely and the pinning stage has initiated. At the fruiting stage, the mushroom mycelium forms small pinheads from where the fruits emerge. Make small holes in the bags when the pinheads are developed.
If you make holes at an early stage, it will increase the chance of contaminants making their way to the grow bags.
5. Incubate the grow bags
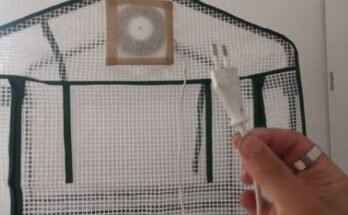
Locate a clean and airy room at your home. To ensure rapid colonization and fruiting keep the grow bags in dark. However, make sure the cultivation rooms are fitted with artificial grow lights because mushrooms need light at the fruiting stage.
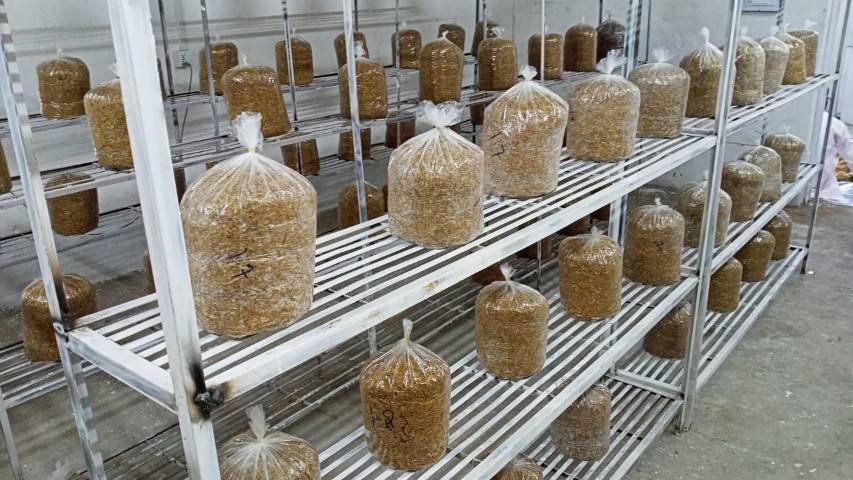
The temperature of the grow room should be between 20 to 25 degrees Celsius. Remember that temperature plays a crucial role in the development of mushroom mycelium. Temperature fluctuations can result in a drastic reduction in mushroom yield.
You must make provisions depending upon the seasonal temperature. Install an air conditioner or heater in the grow room to maintain the temperature. Pearl oyster mushrooms can grow well in a temperature range of 20-30 degrees Celsius.
Maintain high humidity preferably above 70 % in the grow rooms. You can use a humidifier to keep the room environment humid or keep spraying the bags twice or thrice a day regularly.
Very high humidity can also increase the risk of contaminants that require high moisture for their growth. The microbes can start growing on the grow bags or shelves. Therefore, make sure the grow room is fitted with an exhaust fan to remove the excess amount of moisture.
Note: Green and black molds are the most common microbes that can be often seen contaminating the mushroom grow bags. Keep checking the grow bags daily. If you observe any bag contaminated with unwanted microbes discard it immediately. It is advised to throw the contaminated grow bags far away from the grow rooms otherwise they will contaminate the clean bags.
6. Put a casing layer (This step is optional)
You can add a casing layer on a fully colonized substrate. Apply a mix of 50 % vermiculite, 50 % coco coir, and 1% hydrated lime on the top of the pearl oyster mushroom grow bags.
The casing will increase humidity and provide a good quality yield. This step is completely optional. You can even get a good yield without applying a casing layer.
Also, remember when you open the bags to apply a casing layer it can increase the risk of contaminants making their way to the grow bags. So, you must be very careful while applying a casing layer.
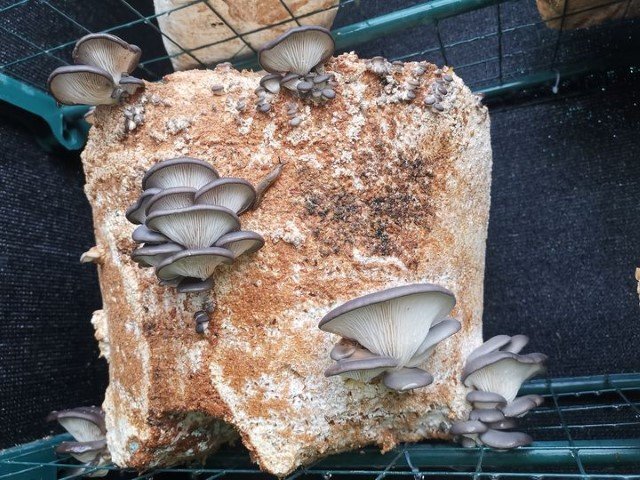
7. Harvest your mushrooms
Within 45 to 60 days the 1st flush of your pearl oyster mushrooms will be ready for harvest. The term ‘flush’ is used for the repeating 3- to 7-day harvest periods of mushrooms and they are followed by a few days of no harvest.
For a mushroom grower, the most exciting moment is to see the first flush coming out of the grow bags. However, you must know when and how to harvest your pearl oyster mushrooms.
If you harvest pearl oyster mushrooms when they are small in size they will be good in texture and flavor, but the yield will not be high.
Let’s get started with harvesting your favorite mushrooms.
- Simply twist the bunch of pearl oyster mushrooms from the base with your hands. Don’t try to pull it directly.
- You can also use a clean scissor or knife to remove the growing bunch of peal oysters.
- Leave those flushes that have just sprouted and wait for 24 hours until they are fully grown and ready for harvest.
- The harvesting must be completed within 2 to 3 days otherwise the mushrooms will start losing their texture and quality.
- As the pearl oyster mushroom flush gets older it dries out and becomes unsuitable for consumption.
- After harvesting the first flush the 2nd flush will be ready for harvesting within 2 to 3 days and you can expect 2-3 flushes and the whole cropping cycle will be completed in 10 days.
When the pearl oyster mushrooms are ready for harvest?
Here are a few things to look for if your pearl oyster mushrooms are ready for harvest or not.
- The mushroom caps start flattening at the edges
- The edges of mushroom caps and gills will turn slightly dark.
- The fruit will start drying out.
Note: Harvest the pearl oyster mushrooms when they show any of the above-mentioned signs else, they will overgrow and lose their quality and taste.
What are the care regimes to ensure a bountiful harvest?
If you follow a proper care regime you can get a bountiful harvest of pearl oyster mushrooms.
Let me share the care regime that I follow to get a good harvest from my pearl oyster mushrooms.
- Spray the substrate with clean water twice a day daily to maintain high humidity in cultivation rooms
- Maintain the temperature of grow rooms between 20 to 30 degrees Celsius.
- Keep the grow bags in the dark until the mushroom mycelium colonizes the bags completely and then expose them to an indirect source of light.
- Keep the grow rooms clean.
8. Store the surplus produce
Storing pearl oyster mushrooms is very important because if they are not stored properly, they can go back quickly.
If you are growing mushrooms at home and don’t intend to sell them then it is recommended to grow mushrooms according to your need. Pearl oyster mushrooms taste great when they are consumed fresh.
If you have a surplus harvest, you can store it for long-term use.
Generally, the pearl oyster mushrooms will stay fresh in the refrigerator for 1 week. For long-term storage, you can try the dry preservation method or put them in a brine solution.
Is pearl oyster mushroom toxic?
Pearl oyster mushroom is non-toxic and completely safe for eating. However, be cautious when hunting for wild oyster mushrooms as they have some poisonous lookalikes. Be sure to know what wild Oyster Mushroom looks like. Or gather mushrooms with someone who has experience with Mushroom hunting.
If you want to make sure that the oyster mushroom you are eating is edible, always buy them from a reliable dealer who deals with commercially grown pearl oyster mushrooms.
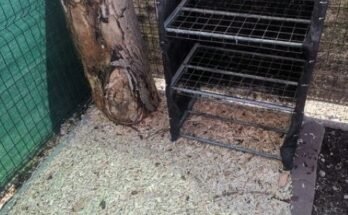
Can you grow pearl oyster mushrooms outside?
Pearl oyster mushrooms can grow outdoors if they are provided with proper temperature, humidity, and an indirect source of light. For novice growers, it is recommended to grow mushrooms indoors.
Once you are experienced then you can grow them outside on wooden logs.
Hope this post will help you to grow your favorite pearl oyster mushrooms. Enjoy your home-grown mushrooms and share them with your family and friends.