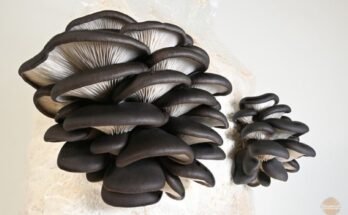
Oyster mushroom is one of the most famous edible mushrooms. Oyster mushroom farming is a great business that can be started with low investment and gives you a quick return. Growing mushrooms need a bit of technical knowledge and expertise and once you learn how to grow them it becomes a fun activity.
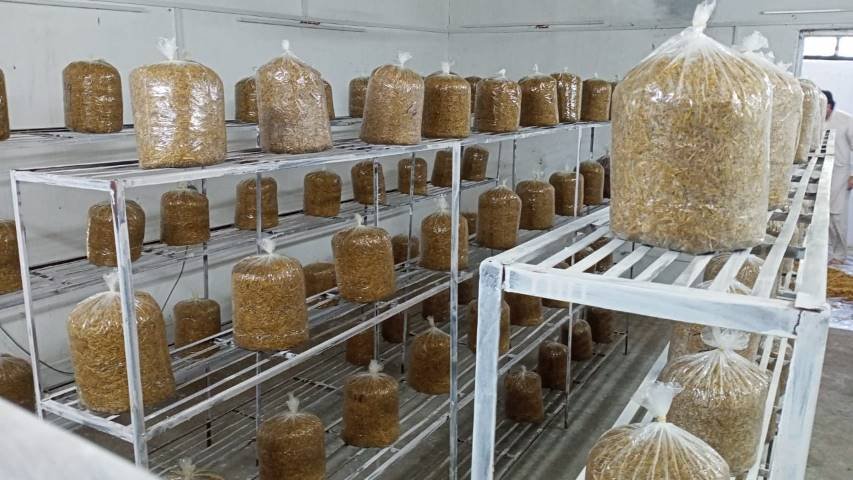
Just like growing any other crop, mushroom farming also requires dedication, commitment, expertise, efforts, and patience. Mushrooms are cultivated in a vertical farming layout. In vertical farming, the crops are grown in vertically stacked layers. It makes the best use of the available area to obtain more yield. It also minimizes the waste of available space.
Fortunately, oyster mushroom farming is not a very tough task. With a bit of technical knowledge and expertise, you can grow oyster mushrooms at home or on a small scale.
In this article, I will share with you the complete details of mushroom farming right from the preparation of spawn to the preservation of harvested oyster mushrooms.
Steps in Oyster mushroom farming
Let’s look into the complete process step by step.
Step I. Isolation and culturing of oyster mushrooms
Selection of the right species
To isolate oyster mushrooms, purchase fresh edible oyster mushrooms from a reputable dealer or market. The variety or type of the oyster mushroom should be known. You should also have basic knowledge about the morphological features of edible oyster mushrooms. It will help you to select the right type of mushroom.
Mother culture preparation
The mother culture of oyster mushrooms can be prepared on agar media plates. Prepare potato dextrose agar PDA (a general-purpose medium for culturing the fungi in the lab).
Recipe of PDA:
- Potato starch 20 g or Potato slices 200-250 g (use potato slices if potato starch is unavailable)
- Dextrose 20 g
- Agar 20 g
- Distilled water 1 L
Mix all the ingredients in distilled water and sterilize the medium in an autoclave or pressure cooker for 30 minutes at 15 to 20 psi pressure. After sterilization pour the media into sterilized 9 cm Petri dishes.
Oyster mushrooms can be cultured by tissue culture of the fruiting bodies. Take a clean tweezer and tease apart the cap of the mushroom to expose the internal tissues. Take tiny pieces of mushroom tissues and transfer them onto Petri plates containing PDA medium with a sterilized tweezer.
Make sure all this work is conducted under sterilized conditions in a safety cabinet or a laminar flow chamber. If the work is not conducted under sterilized conditions the culture will get contaminated very soon by other fungal contaminants.
Then incubate the Petri plates at 25 ℃. Check the plates regularly until the mycelium comes out of the transferred tissues and starts growing on the medium. When the mycelium starts to grow on the medium transfer it to clean PDA plates to prepare multiple subcultures.
The oyster mushroom culture prepared by this process is maintained as the mother culture and is used for the preparation of spawn. Store the mother culture at 4 ℃. Keep subculturing the mother culture after every 6 months.
Step II. Preparation of spawn
Sterilize the grains
When you have the mother culture of oyster mushroom you are all set to prepare the spawn. Take healthy cereal grains such as wheat, rice, sorghum, oats, etc. Use 100% non-GMO grains. Immerse the seeds in water for 12 hours.
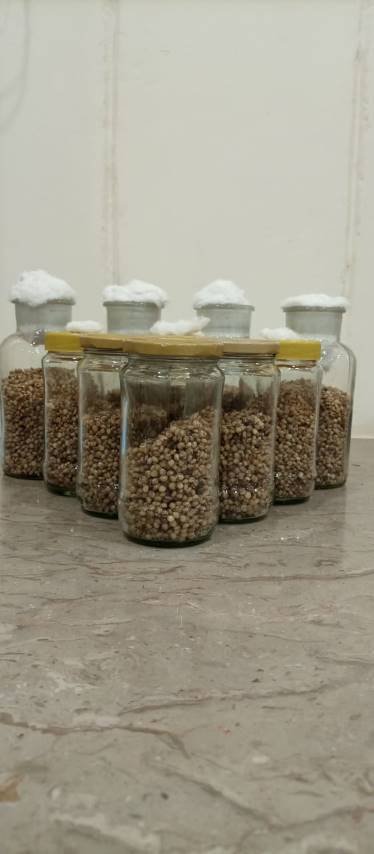
Put the grains in a glass jar or autoclavable biodegradable bags. It is recommended to use biodegradable bags to reduce the negative impact of plastic bags on the environment.
If you are using glass jars, make sure the glass jars have provisions to allow the exchange of air. Make perforations in the lids of the jar and plug them with cotton.
Sterilize the grains in an autoclave or pressure cooker at 15 to 20 psi pressure for 30 minutes. It will sterilize the grains completely and reduce the risk of contamination.
Inoculation of the grains
Do not inoculate the grains immediately after sterilization. Let them cool down for some time. The oyster mushroom mycelium is sensitive to high temperatures it will not be able to grow on very hot grains. When the grains are cooled down to the point that they don’t feel hot to the touch you are all set to inoculate them.
Take a clean oyster mushroom mother culture and cut it into small blocks with a sterilized scalpel. Take 1/4th of the mother culture from a 9 cm Petri plate and transfer it onto the grains. After inoculation, shake the glass jars or spawn bags well to properly distribute the culture in the bags. It will increase the contact of mother culture with grains. All this work should be conducted under sterilized conditions in a safety cabinet or a laminar flow chamber.
Put the inoculated grains at 25 ℃ in complete darkness. The mother culture will cover the grains completely and it will be ready to use in a couple of weeks. Use the mature spawn for mushroom farming as soon as possible and avoid storing it for a long time.
Step III. Preparation of substrate
Several substrates are available to grow oyster mushrooms such as straw, sugarcane bagasse, soy hulls, sawdust, cotton waste, coco coir, coffee grounds, etc.
Check our article for different types of substrates that are good for cultivating oyster mushrooms.
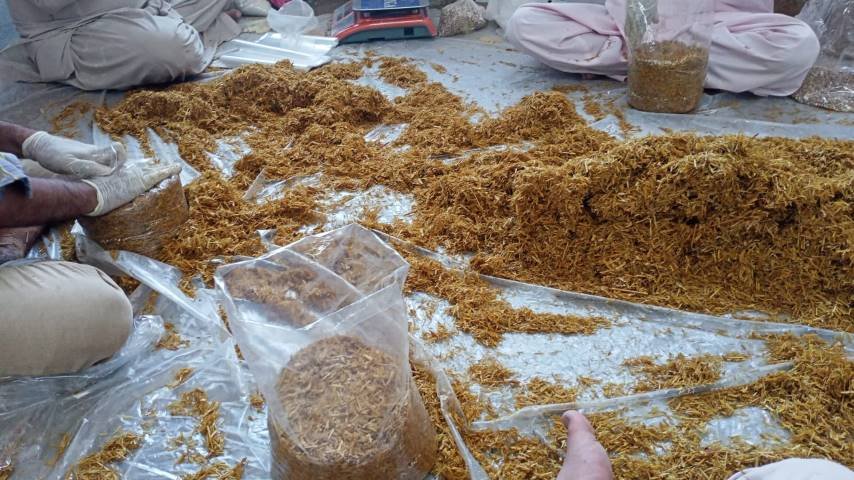
In this article, I will talk about using straw as a substrate for growing oyster mushrooms. Take rice or wheat straw and chop it into 4 to 10 cm pieces. The smaller pieces of substrate make it easier for the mushroom mycelium to grow and colonize.
Moisten the substrate by adding water and keep it for a couple of days covered with plastic sheets for composting. Before filling in the bags make sure the substrate does not have dripping water when squeezed.
Then fill the substrate in autoclavable biodegradable mushroom grow bags. Close the bags tightly after filling. Place the bags in a pressure cooker or autoclave at 15-20 psi pressure for 30 minutes. You can also use a large drum equipped with a stand for holding mushroom grow bags. Fill the drum with water and set it on a burner. Put the bags in the drum and heat it for 2 hours to ensure complete sterilization.
Let the substrate bags cool down for some time. Don’t use them immediately after sterilization.
Here is more in-depth in preparation of Substrate.
Step IV. Spawning
Take the fresh oyster mushroom spawn and inoculate it into the substrate bags. You can inoculate the substrate by layering the spawn into the bags. Use 50 g spawn for inoculating 1.5 kg substrate.
Put a layer of the substrate at the bottom of the bag and then add a layer of spawn. Make 2 layers of spawn between 3 layers of substrate.
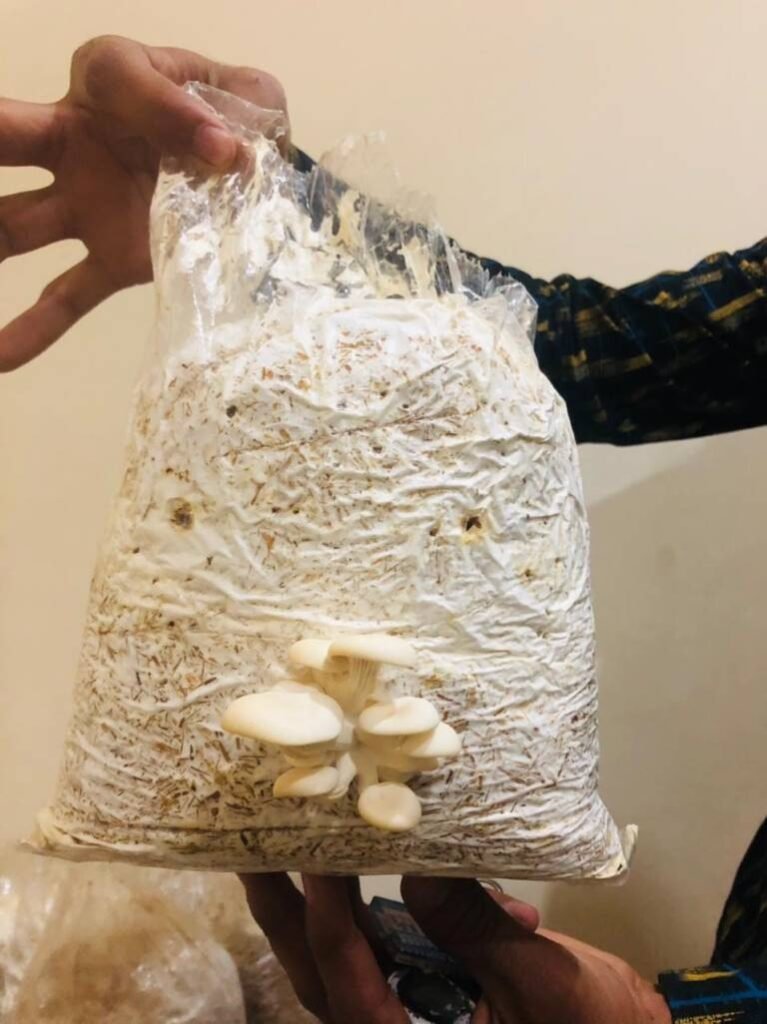
After spawning close the bags tightly and incubate them under controlled conditions (25-28 ℃ and 80-90% relative humidity). The spawn will colonize the substrate bags completely with oyster mushroom mycelium. Make holes in the grow bags to allow the exchange of air.
Make sure the environment of the incubation room is sterile or neat and clean to take a healthy harvest of oyster mushrooms.
Step V. Harvesting
Once the mushroom fruit appears make sure to harvest it as soon as possible before it gets dry or grows too large.
To harvest oyster mushrooms, twist the bunch of the fruit gently with your hand from the base. You can also cut the fruit bunch with clean scissors
Step VI. Sell the fresh oyster mushrooms at farmer’s market
Sell the freshly harvested oyster mushrooms in the nearest farmer’s market before it gets too dry or spoiled. Locate the nearest local farmer’s market. Harvest your mushrooms and take them to the market for sale. People prefer to buy fresh produce from the farmer’s market.

Farmer’s markets provide the best opportunity to the growers for selling their mushrooms and interacting with the customers directly. It also helps the growers in marketing their business by distributing cards, posters, pamphlets, or brochures. Therefore, local farmer’s markets are the best outlets to sell the mushrooms immediately after harvest.
Step VII. Preservation of mushrooms
It is better to use the mushroom fresh otherwise they get too dry and unsuitable for consumption. The first method is to preserve the freshly harvested mushrooms for a week in a brine solution in glass jars.
The other method is to turn the surplus mushrooms into a powder. Dehydrate the mushrooms completely. Put the dried mushrooms in a blender and grind them to a fine powder. Stain this powder with a strainer some large chunks of the mushrooms might be left behind. Put the chunks again in the blender and grind them again until they turn into fine powder.
Add this powder into jars or containers and store it away from direct heat or light. In this way, you can avoid the spoilage of surplus mushrooms and use them for a longer time.
For more queries about mushroom farming please feel free to write to us.